denso_robot_ros2のインストール
COBOTTAのコントローラにSlaveモードのライセンスを登録し、起動権の設定終了後、ROS 2のパッケージをインストールします。
COBOTTAのROS 2パッケージ(denso_robot_ros2)は、Githubに公開されていますが、まだ不完全な部分がありましたので、Forkしたこちらのリポジトリを使用します。
ワークスペース(cobotta_ws)の作成
denso_robot_ros2のインストールを行うために、ワークスペースを作成します。
$ mkdir -p ~/cobotta_ws/src
denso_robot_ros2のダウンロード
次に、ROS 2パッケージをダウンロードします。
$ cd ~/cobotta_ws/src
$ git clone https://github.com/haraisao/denso_robot_ros2
denso_robot_ros2のビルド
ソースコードのダウンロード終了後、パッケージのビルドを行います。
$ cd ~/cobotta_ws
$ colcon build --symlink-install
動作テスト
denso_robot_ros2のビルド終了後、動作テストを実施します。ここで、COBOTTAのIPアドレスは、192.168.0.1とします。
$ source ~/cobotta_ws/install/setup.bash
$ ros2 launch denso_robot_bringup denso_robot_bringup.launch.py model:=cobotta sim:=false ip_address:=192.168.0.1 send_format:=0 recv_format:=2
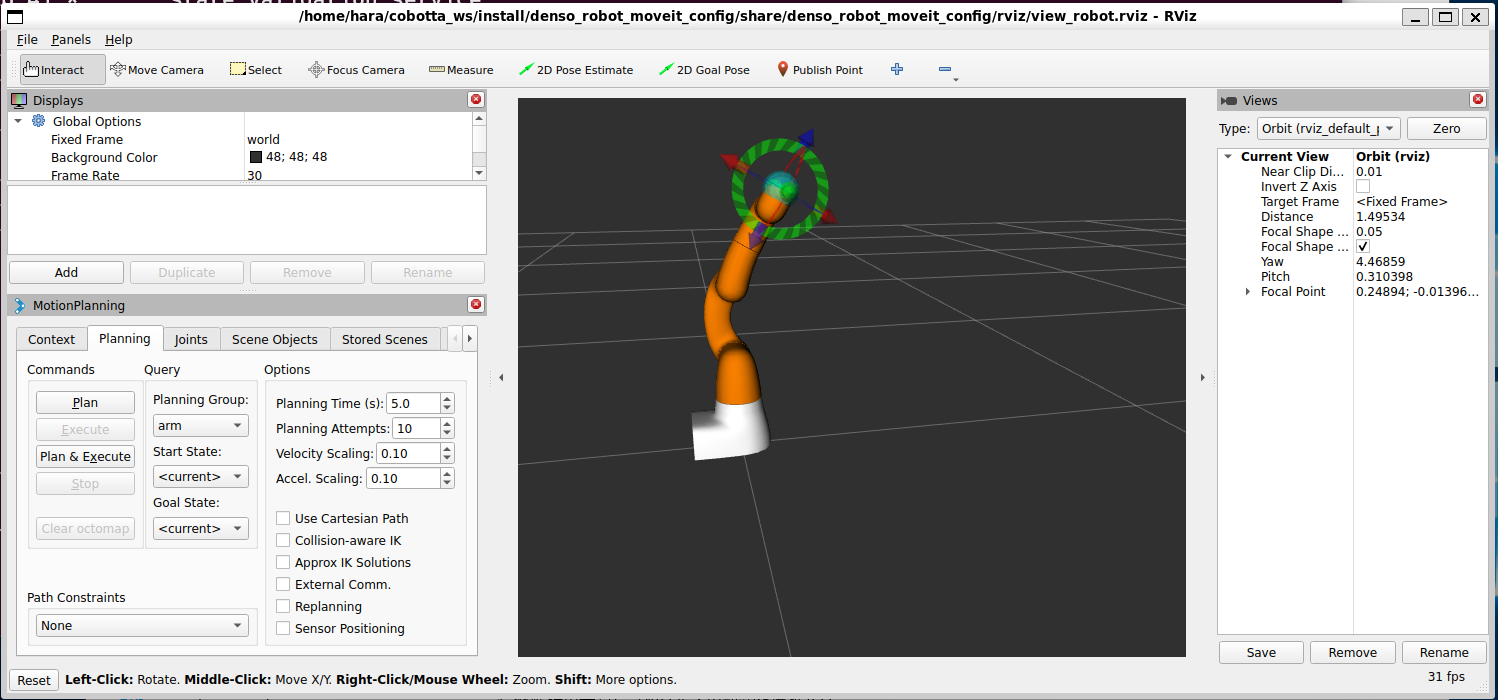
このコマンドを実行すると、下図のようにrviz2が起動し、コントローラがCOBOTTAへ接続を行います。rvizのGUIを操作し、COBOTTAが動作することを確認してください。

ros2_controlのための設定
MoveIt2で使用しているros2_controlは、可能な限りリアルタイムで動作している必要があります。MoveIt2で使用されているcontrol_managerは、あらかじめ「SCHE_RR」でreal-time priorityとして「50」と設定されています。
現在のユーザで real-time priorityが変更可能かどうかは、ulimitコマンドで確認できますので、事前に確認してください。
$ ulimit -a
core file size          (blocks, -c) 0
data seg size           (kbytes, -d) unlimited
scheduling priority             (-e) 0
file size               (blocks, -f) unlimited
pending signals                 (-i) 31399
max locked memory       (kbytes, -l) 65536
max memory size         (kbytes, -m) unlimited
open files                      (-n) 1024
pipe size            (512 bytes, -p) 8
POSIX message queues     (bytes, -q) 819200
real-time priority              (-r) 0
stack size              (kbytes, -s) 8192
cpu time               (seconds, -t) unlimited
max user processes              (-u) 31399
virtual memory          (kbytes, -v) unlimited
file locks                      (-x) unlimited
上記のreal-time priorityを変更可能にするには、以下のコマンドを実行します。
/etc/groupにグループを追加
$ sudo addgroup realtime
$ sudo usermod -a -G realtime $(whoami)
次に、優先度の設定は、/etc/security/limits.conf に以下を追記します。
@realtime soft rtprio 99
@realtime soft priority 99
@realtime soft memlock 102400
@realtime hard rtprio 99
@realtime hard priority 99
@realtime hard memlock 102400
以上で設定は完了です。
このプライオリティの設定は、WSL上ではそのままでは有効になりません。WSLを起動後、su <username> コマンドで新しいShellを起動すれば変更されるようです。WSLでROS 2を使ってCOBOTTAを操作する場合には気を付けてください。

